
P0153: Oxygen Sensor Circuit Slow Response (Bank 2, Sensor 1)
When you purchase through links on our site, we may earn an affiliate commission. See our affiliate disclaimer for more information.
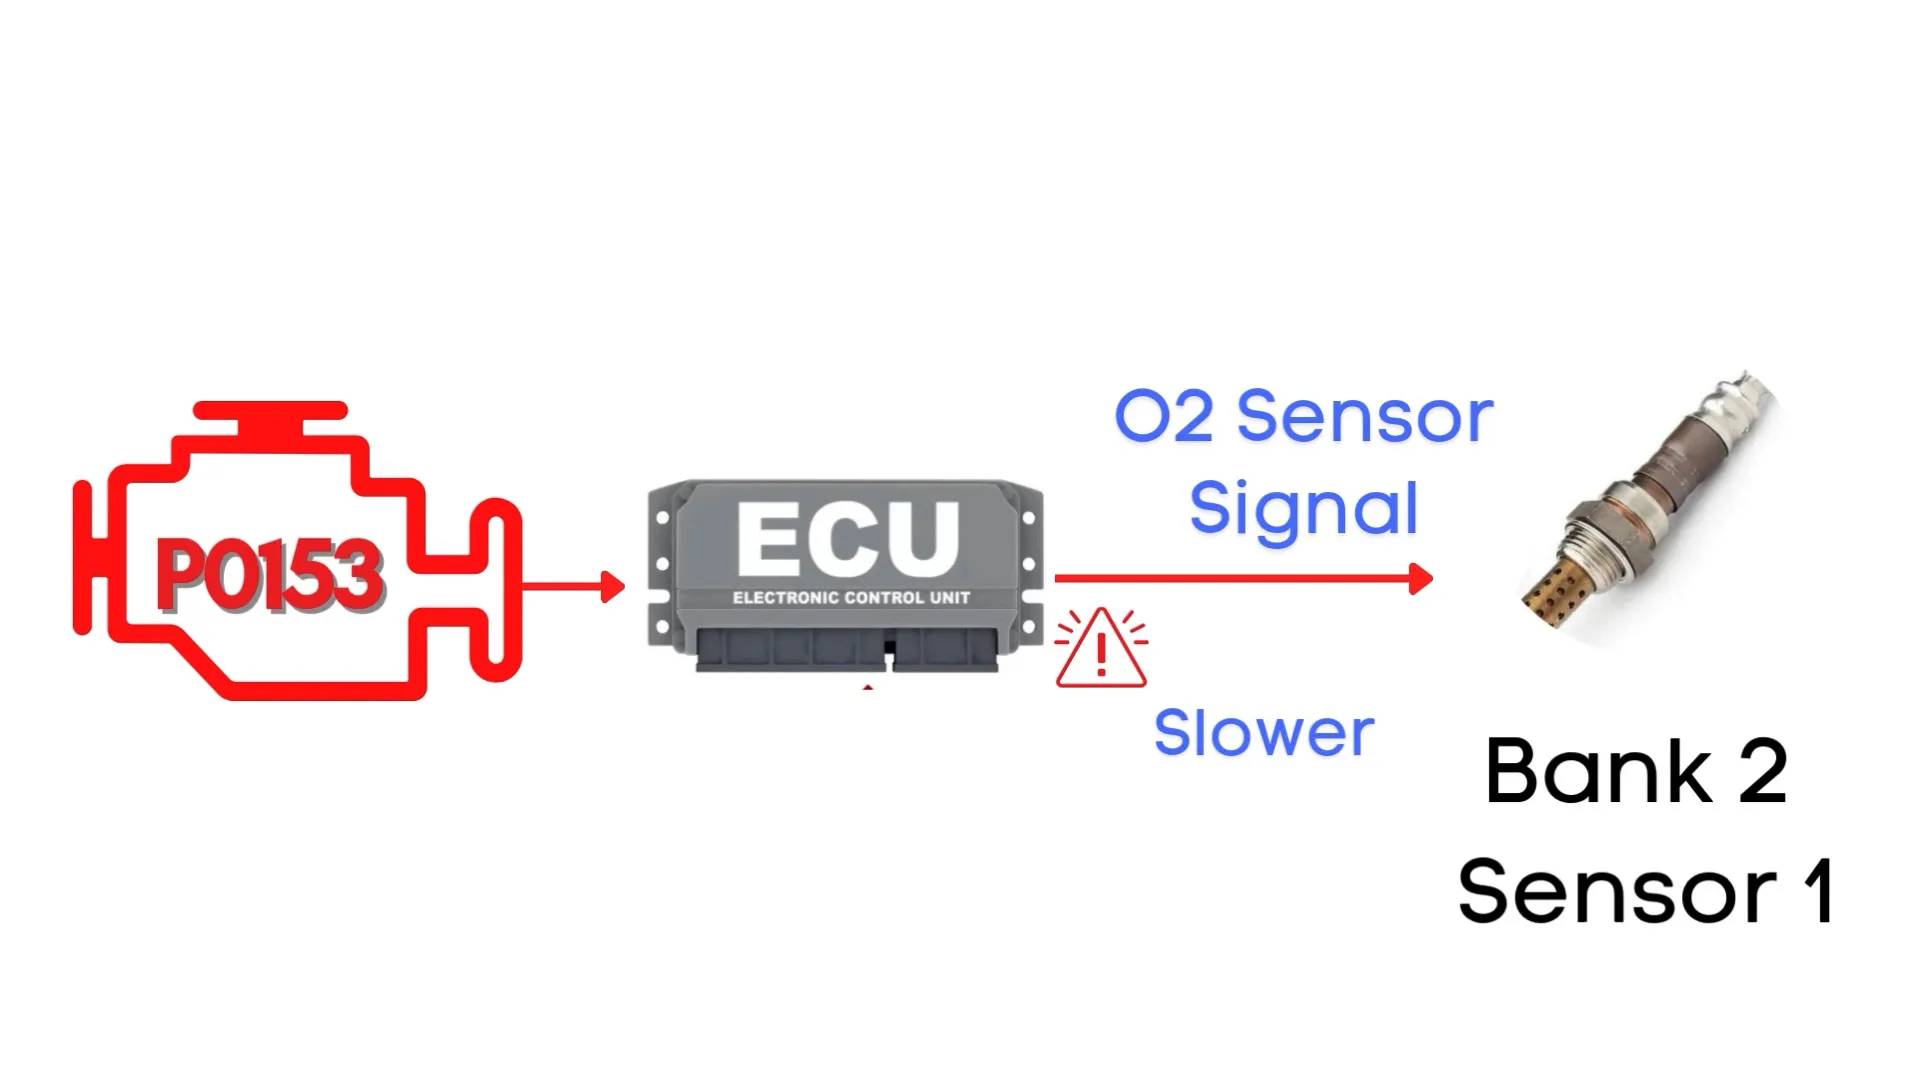
What does the P0153 Oxygen Sensor Circuit Slow Response (Bank 2, Sensor 1) mean?
P0153 code gets triggered when the Engine Control Module detects that the voltage from the oxygen sensor—also known as the air-fuel ratio sensor—is slower than expected. Specifically, we’re talking about the oxygen sensor for Bank 2, Sensor 1.
Read our free complete guide on Kindle and learn how to diagnose sensor-related issues with clarity and confidence.

STOP GUESSING. START DIAGNOSING. SAVE HUNDREDS ON REPAIRS.
Tired of expensive repair bills and mechanics who “parts-cannon” your car without finding the real issue? The “Check Engine” light shouldn’t be a mystery. This guide puts professional-level diagnostics in your hands.
When the P0153 Triggers?
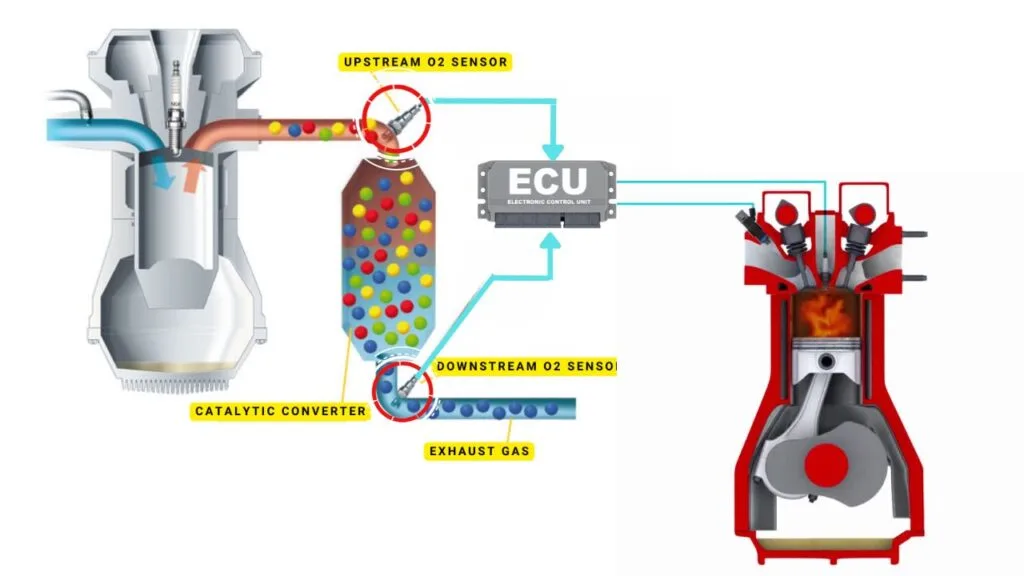
Your vehicle’s oxygen sensor plays a vital role in monitoring the oxygen content in the exhaust gases. It sends this data to the ECU, which then uses it to maintain the optimal air-fuel ratio
The ECU controls the air-fuel ratio by adjusting the timing of the engine’s valves, allowing just the right amount of air and fuel to enter the combustion chamber.
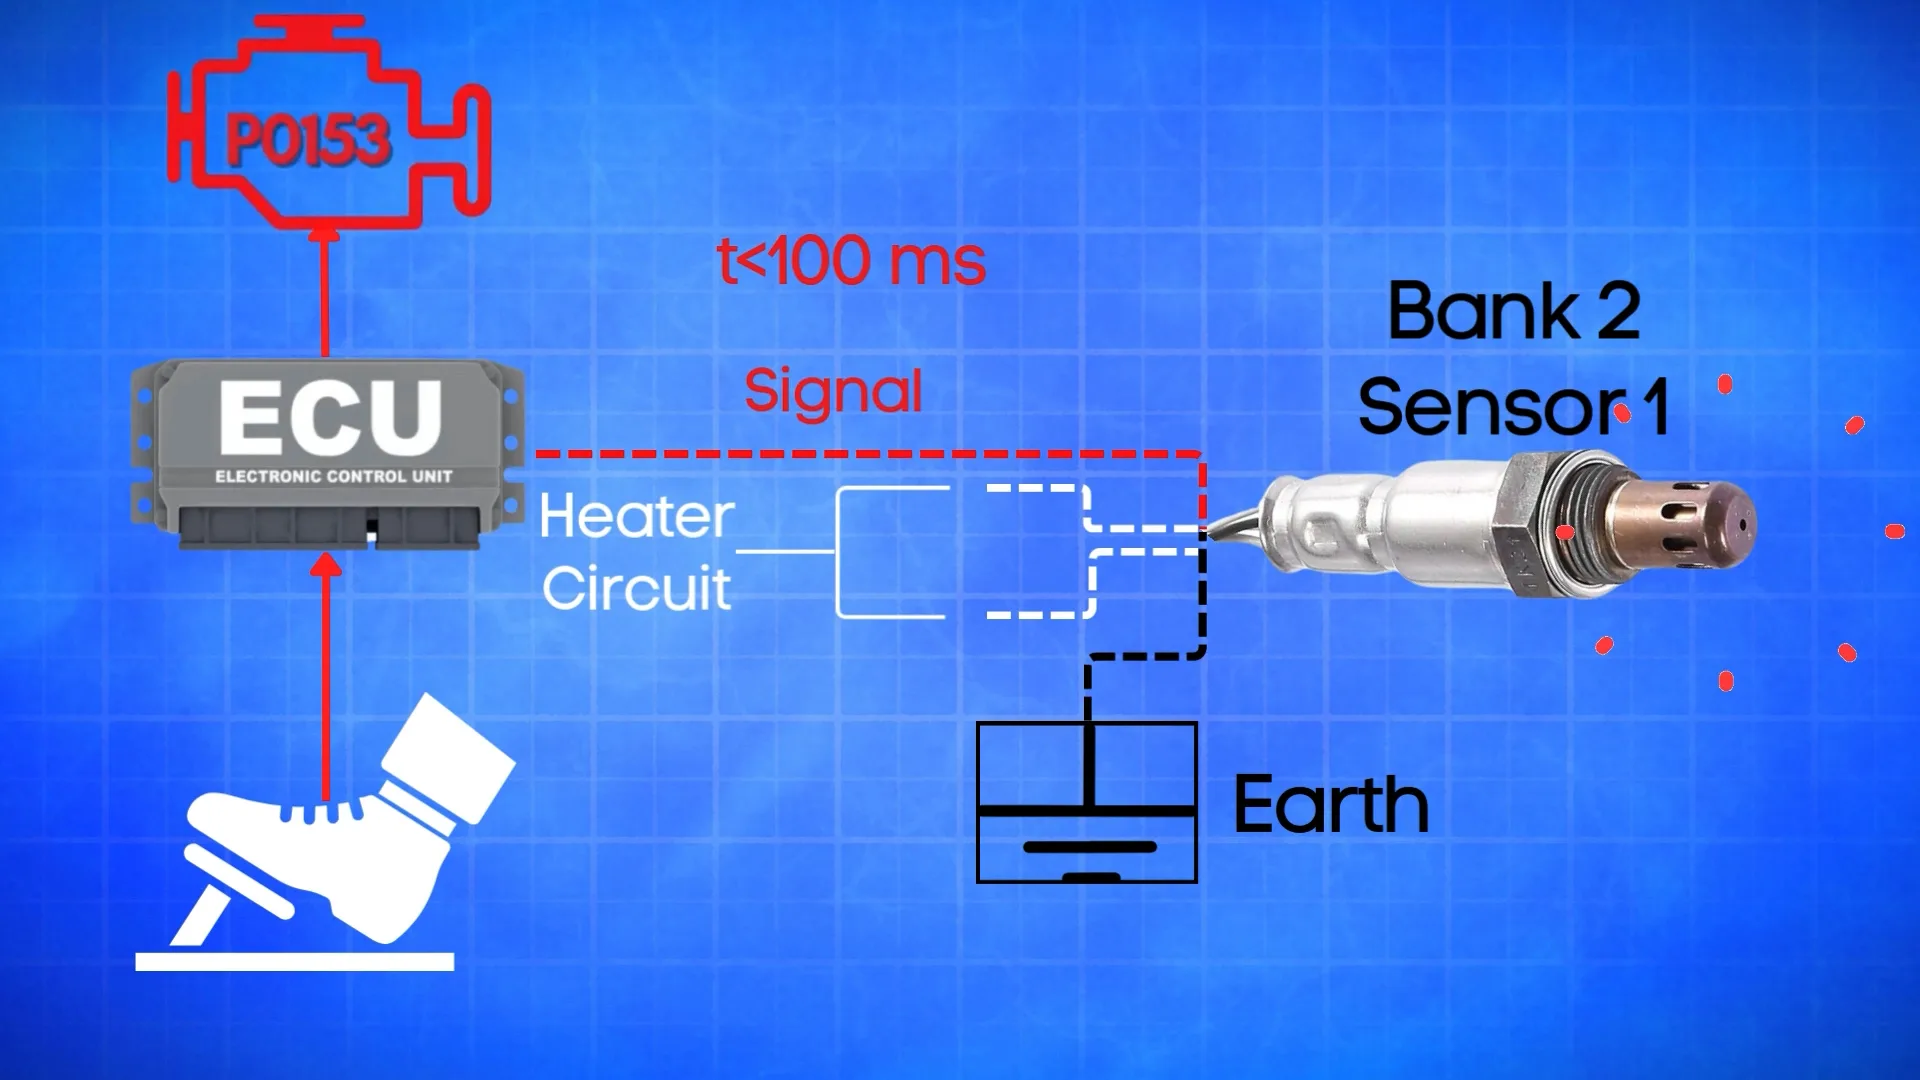
An oxygen sensor typically has four wires. Two are dedicated to the heater circuit within the sensor, and they’re often the same color. The other two are signal wires: one is a reference ground, and the other is the actual oxygen signal wire.
Now, in an engine operating perfectly, the oxygen sensor should quickly respond to changes in the throttle position. When you step on the gas, the air-fuel mixture changes, and the oxygen sensor should register that change almost instantly—usually within 100 milliseconds or less.
If the ECU detects that the oxygen signal in Bank 2, Sensor 1 reacts slower than this, the ECM flags it as a problem and sets the P0153 code.
Read more about:
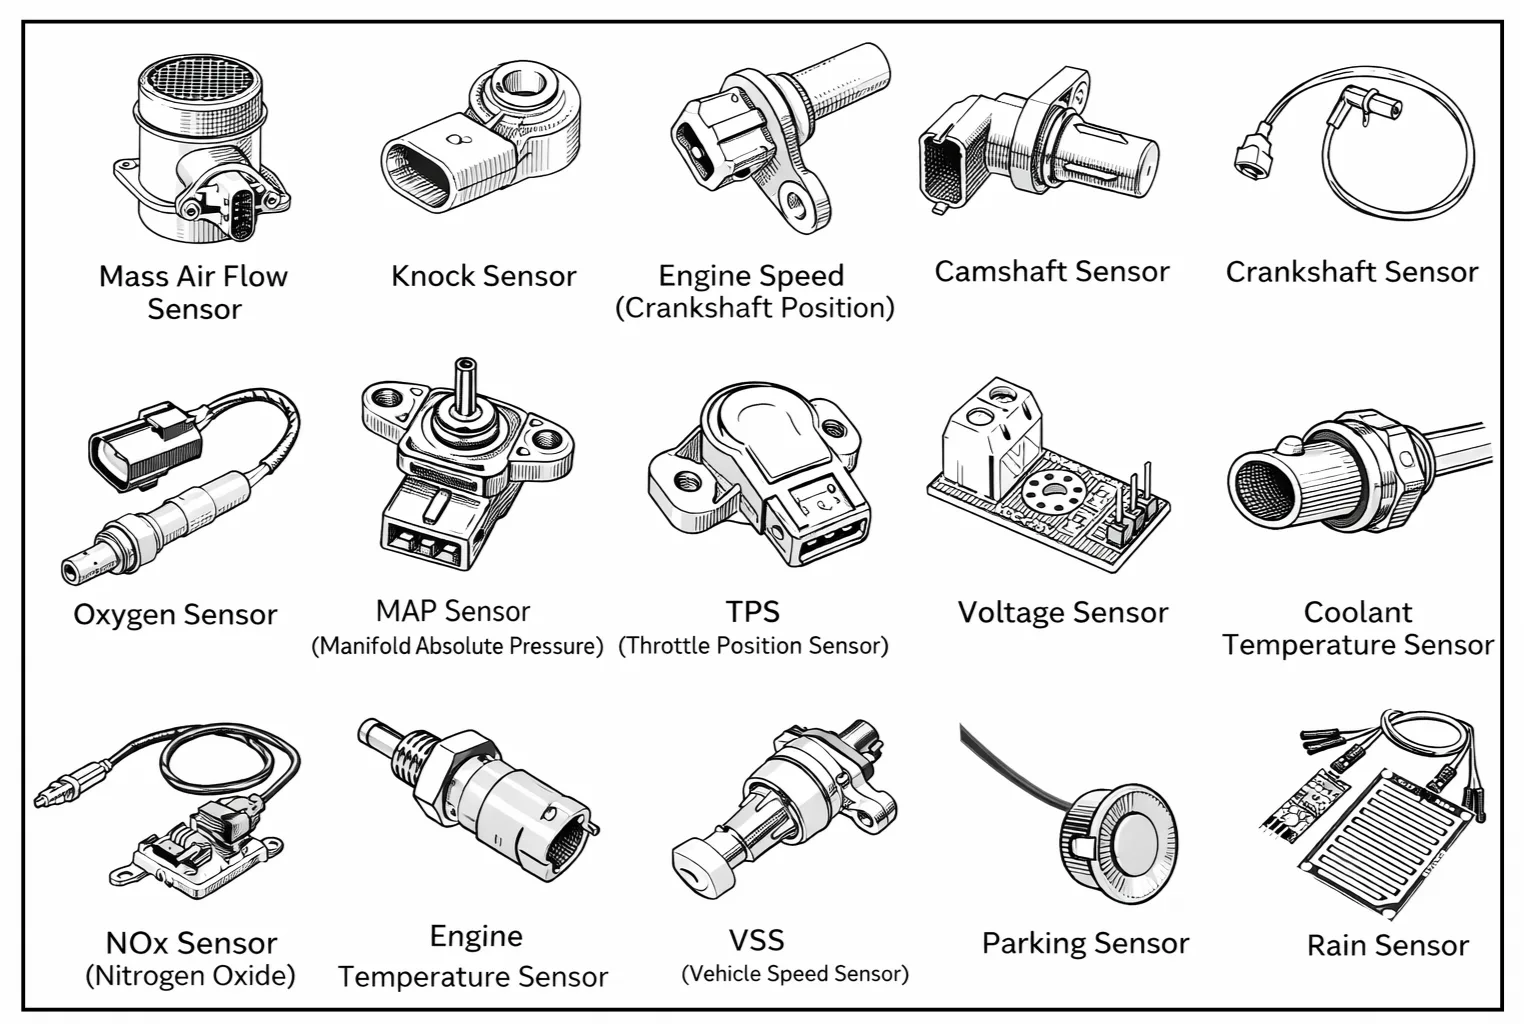
Car Sensors Explained: What They Do and How to Diagnose Them
With the increasing use of electronic systems in modern vehicles,…
What is Bank 2 Sensor 1?
In engines with multiple cylinder banks, like V6 or V8 engines, you’ll have two sides or “banks” of cylinders. Bank 1 typically refers to the side of the engine where cylinder 1 is located, and Bank 2 is on the opposite side.
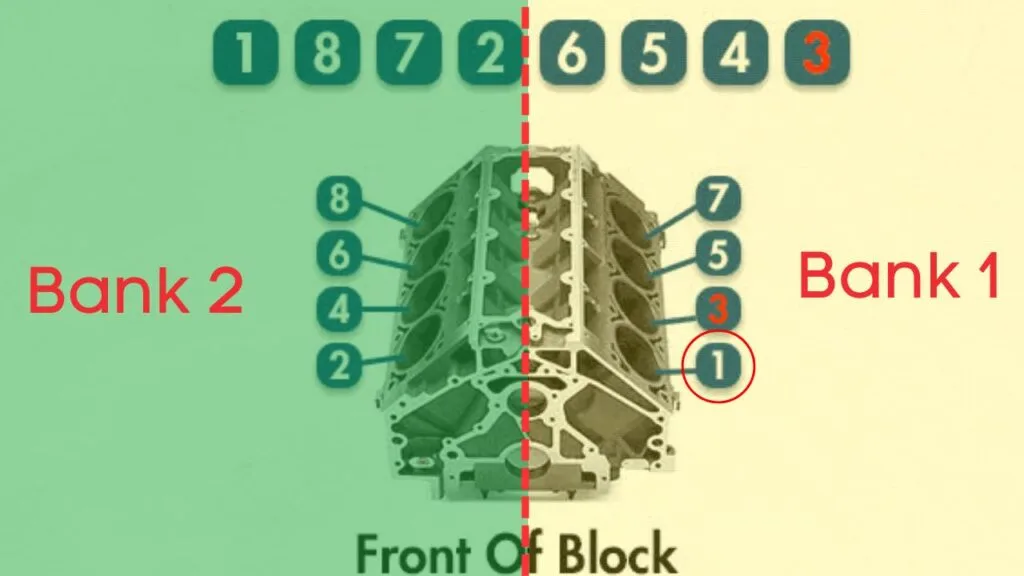
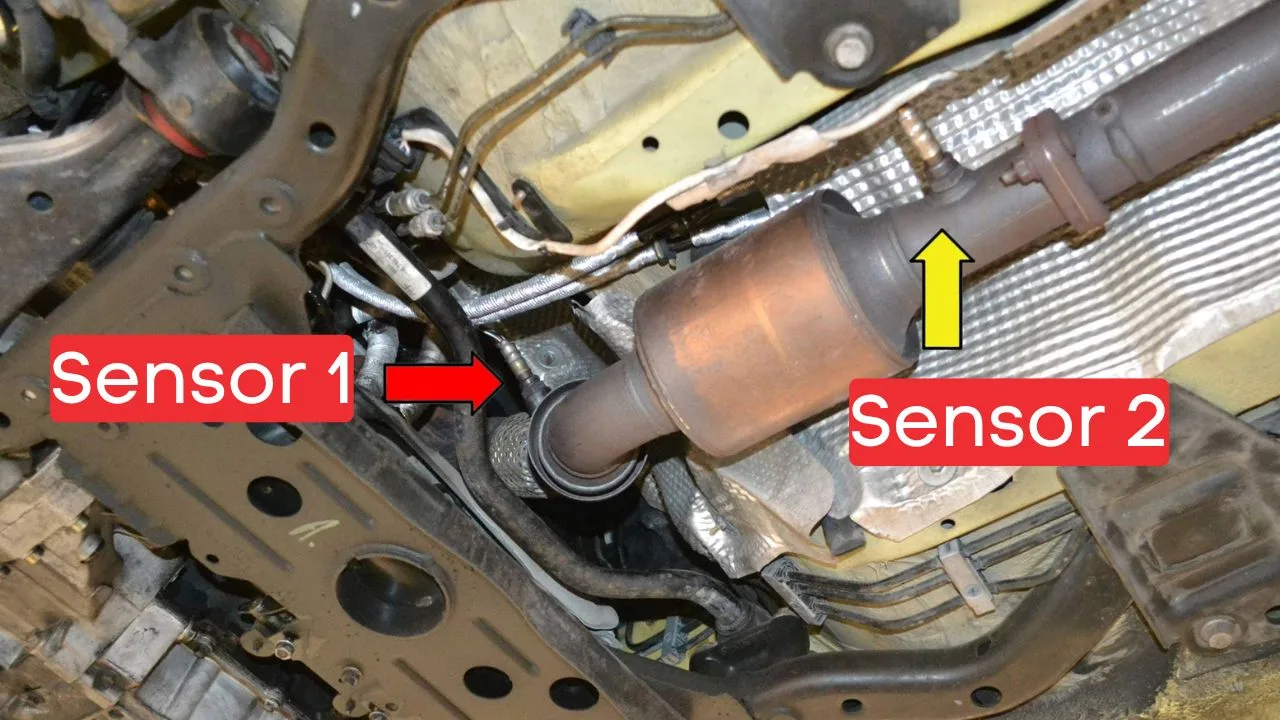
Each bank has its own exhaust line, and each exhaust line is equipped with two catalytic converters. Now, here’s where the oxygen sensors come in—each catalytic converter has two oxygen sensors: an upstream sensor, which we call Sensor 1, and a downstream sensor, known as Sensor 2.

So, when we talk about Bank 2 Sensor 1, we’re focusing on the oxygen sensor that’s upstream on the opposite side of the engine where cylinder 1 is located.
Where is the P0153 Sensor or Oxygen Sensor Located?
The P0153 sensor, or Oxygen Sensor, is typically located in the exhaust system, upstream of the catalytic converter on Bank 2 (the opposite side of the engine with cylinder 1). The exact position can vary based on the vehicle’s make and model, but it’s usually in the exhaust manifold or in the exhaust pipe close to the engine.
Read our free complete guide on Kindle and learn how to diagnose sensor-related issues with clarity and confidence.
STOP GUESSING. START DIAGNOSING. SAVE HUNDREDS ON REPAIRS.
Tired of expensive repair bills and mechanics who “parts-cannon” your car without finding the real issue? The “Check Engine” light shouldn’t be a mystery. This guide puts professional-level diagnostics in your hands.
How To Fix P0153?
Troubleshooting P0153 involves several steps, and we’ll discuss each one in detail. Let’s get started!
Before diving into specific repairs, perform an OBD-II scanner reset to clear the codes. Sometimes, these codes pop up due to recent maintenance work and can resolve themselves after a reset.
To reset the error codes, use an OBD-II scanner. Simply connect the scanner to your vehicle, follow the instructions to clear the trouble codes, and see if the P0153 code reappears.
If the code comes back, it means there’s a persistent issue that needs further troubleshooting.
Step #1 – Start by visually inspecting the heated oxygen sensor.
Carefully examine the sensor itself, along with the wiring and connectors. Look for any signs of physical damage, such as cracks, frayed wires, or loose connections.

Fix: If any damage is found, replace the faulty sensor or repair the wiring before clearing the code.

- 【REPLACE#】15716, 15717, 15718, 15719, ZZC318861, XR3Z9G444CA, 15664, 234-4401, 234-4046. IF THE PLUG OF THE O2 SENSOR IS…
- 【REPLACEMENT FOR】2003-2014 Ford E150 E250 | 1999-2016 Ford E350 Super Duty | 2001-2010 Ford Escape | 1997-2011 Ford Expe…
- 【12-MONTH WARRANTY】If for any reason at all, you are not fully satisfied with the upstream downstream oxygen sensor, sim…
Step #2 – Check for a blown fuse.
First, locate your car’s fuse box. You’ll need to find the specific fuse that controls the oxygen sensor heater circuit. To do that, check the diagram on the back of the fuse box cover—it’ll tell you which fuse is the one you’re looking for.
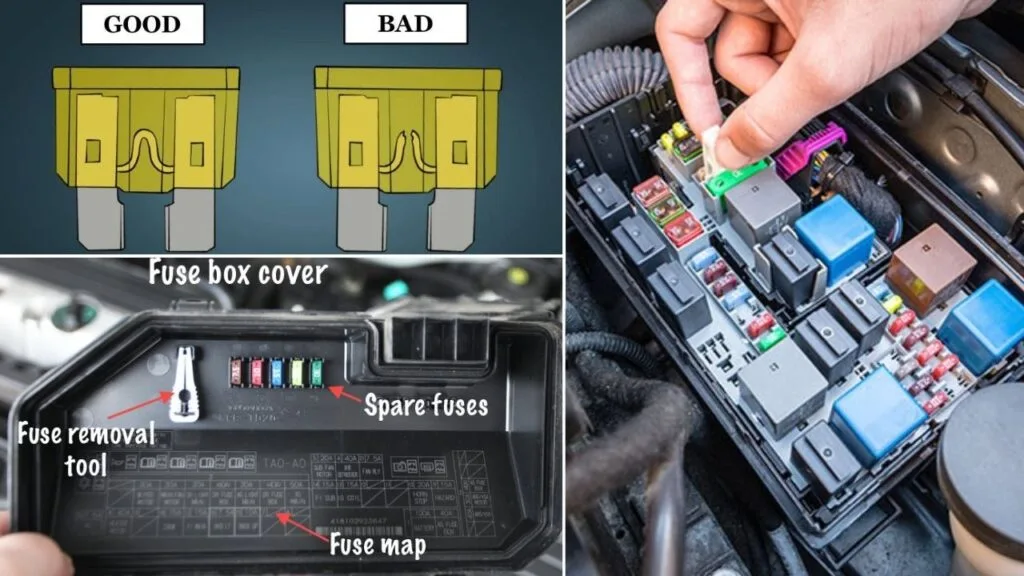
Fix: Once you’ve found the fuse, inspect it closely. If the fuse link is broken, it’ll need to be replaced.

- 【Meet all your needed size】– The fuse kit includes micro size 50pcs, mini size 160pcs and standard size 90pcs. Three st…
- 【Reasonable quantity matching】– We increase the number of fuses with commonly used current specifications of 10A/ 15A/ …
- 【High quality and wide application】– The fuse is made of environmentally friendly plastic and zinc alloy. The blade fus…
Step #3 – Check for broken wires.
Next, check the wiring around the oxygen sensor. Look for any broken or frayed wires. If you spot any damage, repair the wires and recheck to see if the P0153 code is cleared.
If the fuse and wiring are in good condition, but the P0153 code persists. Let’s move on to the next step.
Test: Use a digital multimeter to perform a continuity test on the wiring between the sensor and the ECM. This ensures there are no open circuits or high resistance in the wiring.

- Additional Tips – The following incorrect operations may cause the multimeter not to show results: Firstly, the plugs of…
- Versatile Digital Multimeter – Accurately measures AC/DC Voltage, DC Current, Resistance, and Diode. This Multimeter is …
- Troubleshooting with Accuracy – This Multimeter has a sampling speed of 2 times per second; Built-in a backlight LCD dis…
Step #4 – Test the oxygen sensor heater.
Oxygen sensors typically have four wires. Two of these wires, usually of the same color, are dedicated to the heater circuit within the sensor.
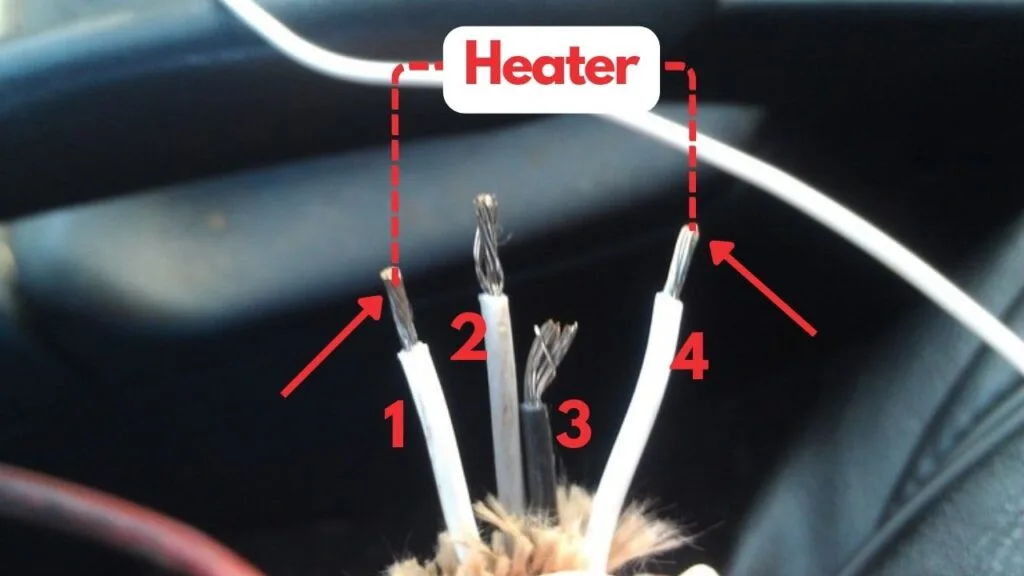
To test the heater circuit, you’ll need a multimeter. Set the multimeter to check for continuity, then place the probes on the two heater wires. If the circuit has continuity, the multimeter will beep, indicating that the heater is functioning.
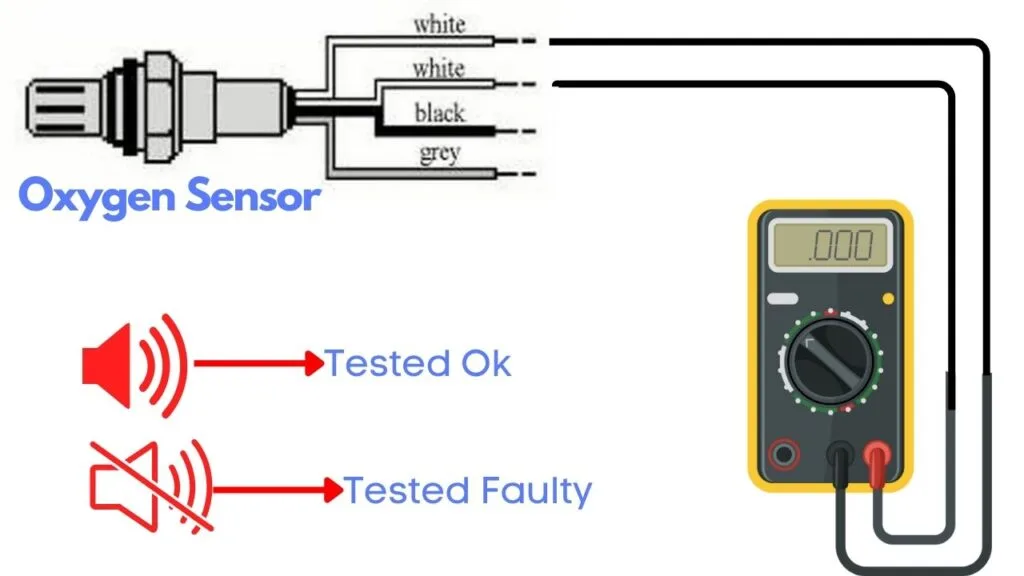
If there’s no beep, it means the heater circuit is broken, and you’ll need to replace the oxygen sensor.
- CEL Doctor: The ANCEL AD310 is one of the best-selling OBD II scanners on the market and is recommended by Scotty Kilmer…
- Sturdy and Compact: Equipped with a 2.5 foot cable made of very thick, flexible insulation. It is important to have a st…
- Accurate Fast and Easy to Use: The AD310 scanner can help you or your mechanic understand if your car is in good conditi…
If the P0153 code reappears, this likely points to a more persistent issue requiring further diagnosis.
Step #5 – Check Exhaust Leaks
Cracks or leaks in the exhaust manifold, catalytic converter, muffler, or exhaust pipes can let extra oxygen into the system. This causes incorrect O2 sensor readings, which may trigger fault codes like P0153.
Fix: For small leaks, you can use MufflerSeal (an iron-reinforced paste) to seal mufflers, pipe joints, and exhaust cracks.

- J-B Weld Muffler Seal: MufflerSeal is an iron reinforced paste designed to seal mufflers, pipe joints and exhaust system…
- Cure Process: MufflerSeal can cure in two ways: By allowing the product to fully harden after it has been applied which …
- Projects: Mufflers, Pipe Joints and Exhaust Systems.
Symptoms of the P0153 Code
Symptoms associated with P0153 can include:
- Diminished fuel efficiency.
- Black smoke from exhaust due to a rich cold start condition.
- Delayed start up due to a lean cold start condition.
- Other related diagnostic trouble codes may also be stored.