
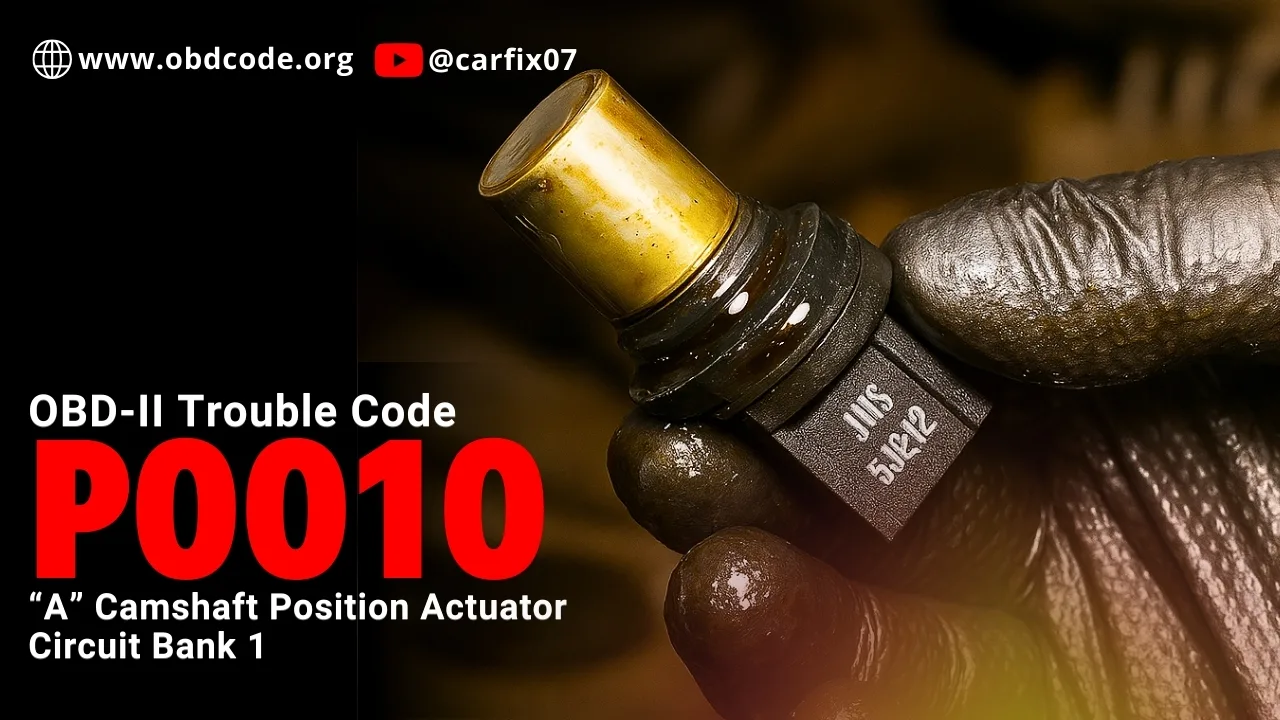
P0010 Code Explained: “A” Camshaft Position Actuator Circuit Bank 1 – Causes & Fixes
When you purchase through links on our site, we may earn an affiliate commission. See our affiliate disclaimer for more information.
What does the P0010 “A” Camshaft Position Actuator Circuit Bank 1 mean?
The P0010 code means that the ECM has detected a circuit issue with the solenoid actuator that directs oil pressure to the engine’s Variable Valve Timing system. it indicates an issue with the camshaft position actuator circuit for Bank 1, specifically refers to the intake camshaft.
What Does Bank 1 Mean?
On engines with more than one cylinder bank, such as V6 or V8 engines, the engine is divided into Bank 1 and Bank 2.
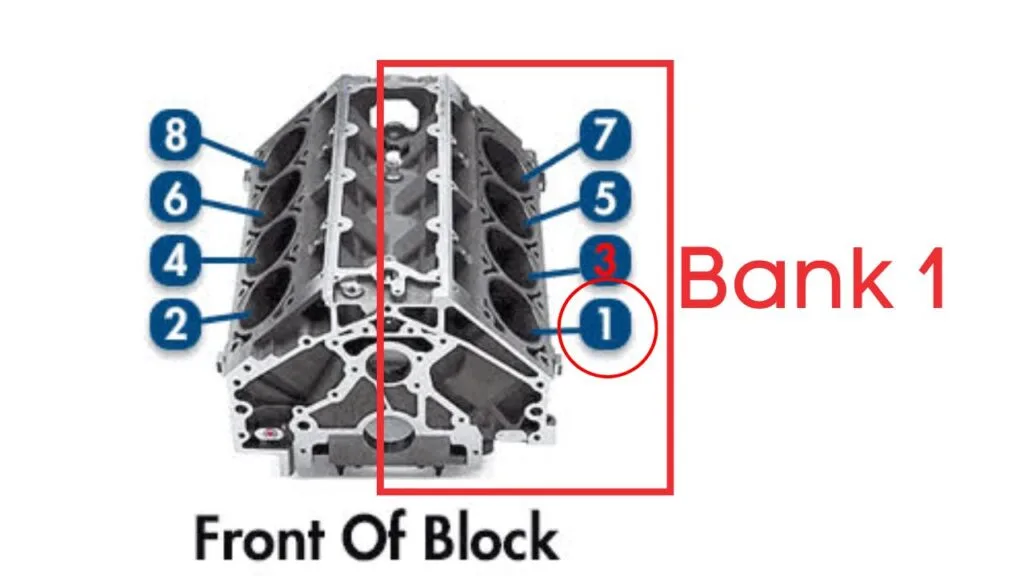
- Bank 1 is the side of the engine that contains cylinder number one.
- Bank 2 is the opposite side.
The P0010 code applies only to Bank 1 and “A” indicates Intake camshaft.
Read our free complete guide on Kindle and learn how to diagnose sensor-related issues with clarity and confidence.
STOP GUESSING. START DIAGNOSING. SAVE HUNDREDS ON REPAIRS.
Tired of expensive repair bills and mechanics who “parts-cannon” your car without finding the real issue? The “Check Engine” light shouldn’t be a mystery. This guide puts professional-level diagnostics in your hands.
When Does the P0010 Code Trigger?
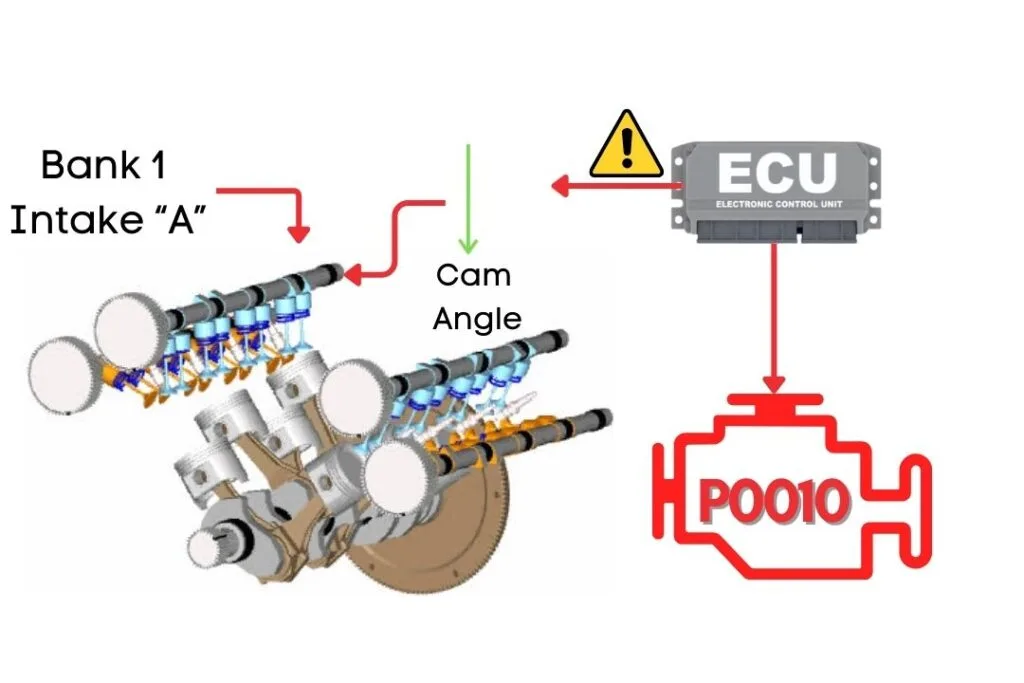
The camshaft position sensor measures the position of the camshaft and sends this signal to the ECU. The ECU then sends a pulse command to the Variable Valve Timing (VVT) solenoid to advance or delay the cam position based on the engine load and speed. The VVT solenoid adjusts the cam phaser accordingly.
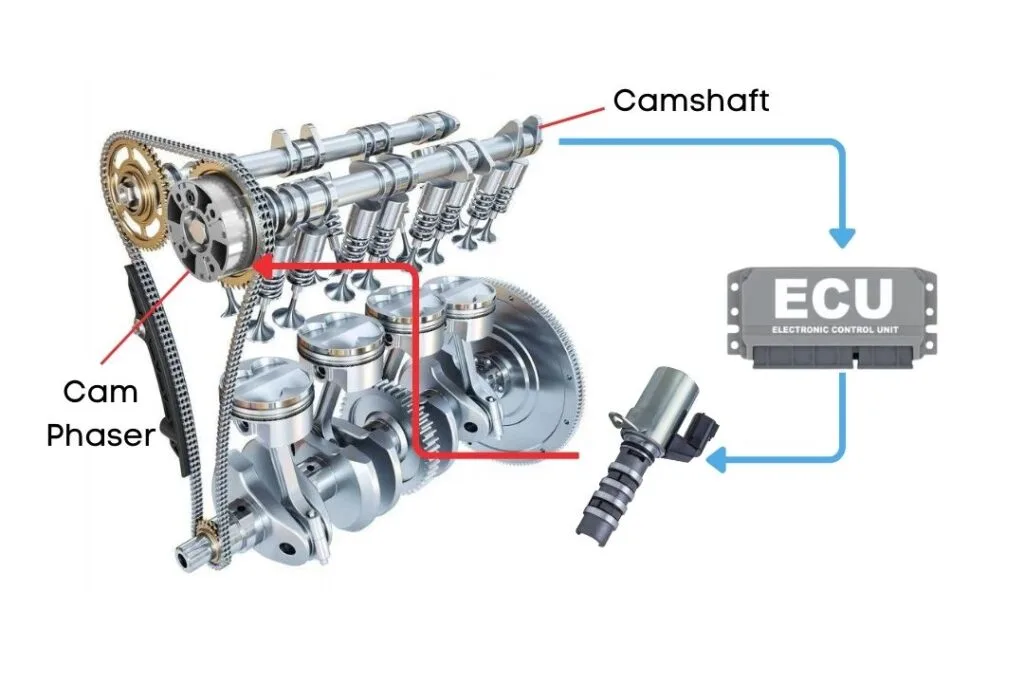
When the ECU detects that the Bank 1 intake camshaft position is not reaching the targeted cam angle, it triggers OBD-II code P0010.
Read more about:
Car Sensors Explained: What They Do and How to Diagnose Them
With the increasing use of electronic systems in modern vehicles,…
How To Fix P0010?
Troubleshooting P0010 involves several steps, and we’ll discuss each one in detail. Let’s get started!
Before diving into specific repairs, perform an OBD-II scanner reset to clear the codes. Sometimes, these codes pop up due to recent maintenance work and can resolve themselves after a reset.
Read our free complete guide on Kindle and learn how to diagnose sensor-related issues with clarity and confidence.
STOP GUESSING. START DIAGNOSING. SAVE HUNDREDS ON REPAIRS.
Tired of expensive repair bills and mechanics who “parts-cannon” your car without finding the real issue? The “Check Engine” light shouldn’t be a mystery. This guide puts professional-level diagnostics in your hands.
To reset the error codes, use an OBD-II scanner. Simply connect the scanner to your vehicle, follow the instructions to clear the trouble codes, and see if the P0010 code reappears.
If the code comes back, it means there’s a persistent issue that needs further troubleshooting.
How to Prevent OBD Trouble Codes and Avoid the Check Engine Light
Regular vehicle maintenance is the best way to prevent OBD trouble codes and keep the check engine light from appearing. Follow your vehicle’s recommended service schedule, change engine oil and filters on time, use the correct fuel and fluids, and fix small problems before they turn into expensive repairs.
Never miss your vehicle service again. Download Carvio and easily track fuel usage, maintenance history, and service reminders to help keep your vehicle running smoothly.


⚠️ Safety Considerations Before Fixing P0010
Allow the engine to cool completely before beginning any inspection or repair work. Disconnect the negative battery terminal to prevent accidental short circuits or unintentional actuator movement while working on camshaft actuators, oil control valves, or VVT components.
Avoid touching hot engine parts, and keep tools and wiring clear of rotating components at all times.
Step-by-Step Guide to Fix OBD2 Code P0010
Step 1: Verify the Fault Code
Connect an OBD2 scanner to the vehicle’s diagnostic port and scan the system to confirm that code P0010 is present. Carefully check for related camshaft timing, oil control valve (OCV), or variable valve timing (VVT) codes, as these may indicate a shared electrical or oil-pressure-related issue.
Record freeze frame data, including engine RPM, oil temperature, and load conditions at the time the code was set. This information can help identify whether the fault occurs during startup, idle, or acceleration.
After documenting the codes, clear them and perform a short test drive. If P0010 returns immediately, the issue is likely electrical or mechanical rather than intermittent.
Tools required:
OBD-II scan tool (basic or advanced)
Estimated time:
5–10 minutes
Estimated cost:
$0 if you already own a scan tool, or $20–$100 depending on scanner type (many parts stores scan for free)

- CEL Doctor: The ANCEL AD310 is one of the best-selling OBD II scanners on the market and is recommended by Scotty Kilmer…
- Sturdy and Compact: Equipped with a 2.5 foot cable made of very thick, flexible insulation. It is important to have a st…
- Accurate Fast and Easy to Use: The AD310 scanner can help you or your mechanic understand if your car is in good conditi…
Step 2: Check Engine Oil Level and Condition
Inspect the engine oil level and overall oil quality, as proper oil flow is critical for camshaft actuator and oil control valve operation. Low oil level, thick sludge, or heavily contaminated oil can prevent the camshaft actuator from responding correctly, triggering code P0010.
Check the oil using the dipstick and look for signs of:
- Low oil level
- Thick, dark, or sludged oil
- Burnt smell or metal particles
If the oil appears dirty or overdue for service, perform an oil and filter change using the manufacturer-recommended oil grade before continuing further diagnosis.
Tools required:
Engine oil dipstick, clean rag, correct engine oil (if topping up)
Estimated time:
5–15 minutes (oil change may take longer)
Estimated cost:
$0–$20 for oil top-up, or $40–$100 for an oil and filter change (depending on vehicle and oil type)

- Mobil 1 Advanced Fuel Economy full-synthetic motor oil 0W-20 is low-viscosity to help improve fuel economy.*
- Utilizes Mobil 1’s signature Triple Action Formula to deliver outstanding engine performance, protection, and cleanlines…
- Helps protect critical engine parts for up to 10,000 miles between oil changesm,** controlling oxidation to prevent oil …
Step 3: Verify Camshaft Position Signal and Related Wiring
Verify that the camshaft position sensor (Bank 1) is supplying a stable and consistent signal to the ECM. An intermittent camshaft position signal or unstable wiring can prevent the ECM from accurately controlling the camshaft actuator, leading to code P0010.
Inspect the sensor connector and wiring for:
- Loose or corroded terminals
- Damaged or oil-contaminated connectors
- Broken, chafed, or pinched wires
If available, use a scan tool to monitor live camshaft position data and check for signal dropouts while the engine is running or when gently moving the wiring harness. Repair any wiring faults or replace the sensor if the signal is unstable or out of specification.
Tools required:
Flashlight, basic hand tools (for connector access)
Estimated time:
10–20 minutes
Estimated cost:
$0–$30 (wiring repair or connector cleaning, if needed)

- Comprehensive Tool Set: The Cartman 148 Piece Tool Kit includes all the crucial tools needed for everyday home repairs a…
- Sturdy and Corrosion-Resistant: All tools in the kit are heat-treated, ensuring that they resist corrosion and remain st…
- Convenient Storage: The kit comes in a sturdy and handy blow-molded case, which securely houses each tool in its respect…
Step 4: Test the Camshaft Actuator Solenoid
Disconnect the camshaft actuator solenoid (oil control valve) connector and use a digital multimeter to test the solenoid’s internal resistance. Compare the measured resistance value with the manufacturer’s specifications to determine whether the solenoid is operating correctly.
Next, check for proper power supply and ground signals at the connector with the ignition switched ON (engine OFF). An absence of voltage, poor ground, or readings outside specification may indicate a wiring fault, blown fuse, or ECM control issue.
If the solenoid resistance is out of range or electrical signals are inconsistent, replacement of the camshaft actuator solenoid is recommended.
Tools required:
Digital multimeter (DMM), vehicle wiring diagram or service manual
Estimated time:
25–60 minutes
Estimated cost:
$0 if testing only, or $50–$200 if sensor replacement is required (varies by vehicle)

- Versatile Settings – The AstroAI Digital Multimeter accurately measures AC/DC Voltage, AC/DC Current, Resistance, Contin…
- Non-Contact Safety – This DMM is designed with safety in mind. The NCV Function minimizes exposure to live wires; the pr…
- Practical Features – When using a Multimeter, the small details like Data Hold, a Large Backlight LCD Screen, Kickstand,…
Step 5: Replace the Actuator Solenoid if Necessary
If electrical testing indicates out-of-spec resistance, no proper power or ground signal, or the solenoid is mechanically stuck or unresponsive, replace the Bank 1 camshaft position actuator solenoid (oil control valve).
Remove the old solenoid following manufacturer procedures, ensuring the mounting area is clean and free of debris. Install the new solenoid, reconnect the electrical connector securely, and reinstall any components removed for access.
After replacement, reconnect the battery, clear the trouble codes, and perform a test drive to verify that code P0010 does not return and engine performance has returned to normal.
Tools required:
Basic hand tools (socket set, ratchet), Torque wrench (recommended)
Estimated time:
30–45 minutes
Estimated cost:
$60–$250 (actuator solenoid replacement, depending on vehicle)
What does OBD2 code P0010 mean?
Code P0010 indicates a problem with the “A” camshaft position actuator control circuit on Bank 1. This usually involves the variable valve timing (VVT) solenoid or its wiring.
What are the common causes of P0010?
Common causes include a faulty camshaft position actuator solenoid, dirty or low engine oil, damaged wiring or connectors, or internal actuator failure.
Can low engine oil cause code P0010?
Yes. Low, dirty, or incorrect engine oil can prevent proper operation of the camshaft actuator and trigger the P0010 trouble code.
Is it safe to drive with a P0010 code?
Short-distance driving may be possible, but continued driving can lead to reduced engine performance, poor fuel economy, and potential engine damage.